
Step-by-Step Guide: Creating D365FO Build and
Deploy Pipelines
Azure DevOps Build Pipeline
I will walk through the
standard procedures for setting up a D365FO Azure DevOps build pipeline.
Microsoft References:
Before we begin, please
refer to the following documentation for context:
- Build
automation that uses Microsoft-hosted agents and Azure Pipelines
- Upload assets
by using Azure Pipelines
- Create a
Dynamics Lifecycle Services connection in Azure pipelines
Step 1:
Deploy the Build
Server from LCS:
Login to Azure
DevOps and install Dynamics 365 Finance and Operation tools:
Install the «Dynamics 365 Finance and Operations
Tools» extension

Step 2
: Create personal access token (PAT)
Navigate to DevOps > User Settings > Personal Access Tokens.
Scopes: Full Access, Expiration (choose the date as you wish, longer the
better).
Step 3: Navigate to
Azure DevOps >> Pipeline

Step 4: Clone
the pipeline and name it as you wish (Example: Build Dev)

Step 5 Edit
the Build
Dev Pipeline:
Choose the Agent pool:

Step 6: Provide the repo branch path on the server
path column.

Step 7: Modify the repo branch name if needed:

Rest of the pipelines are standard.
We will proceed with the Release pipeline.
Steps to create a new release
pipeline.
Step 1: Navigate to Azure DevOps >Pipeline
> Release.

Step 2: Click on the New , to create a new release
pipeline

Step 3 : Select Empty Job
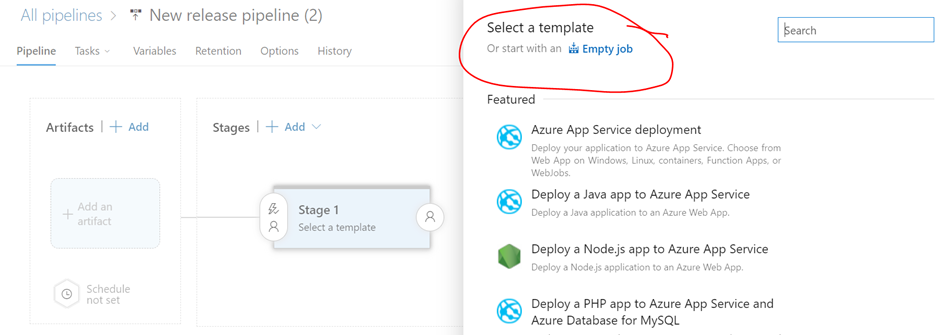
Step 4: Rename the Release Pipeline, Click “Add an artifact”

Step 5: Select the Project Name & Source Build
Pipeline
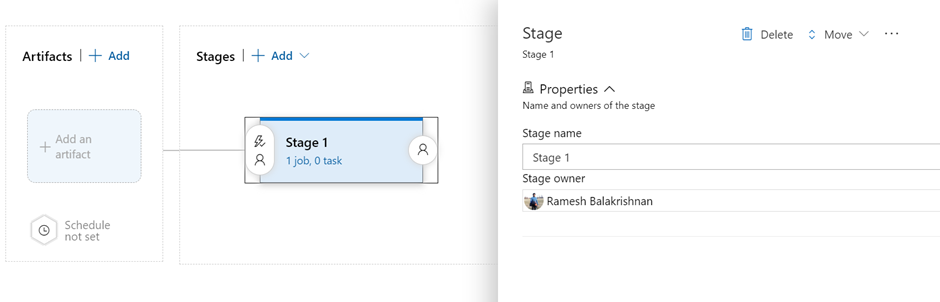
Step 6: Add
the task in Stages.

Step 7: In total we need 3 stages as shown below.

Ø Select the Agent pool

Stage 1 : Select “Install MSAL.PS” to enable
authentication.

Stage 2: Select “Dynamics Lifecycle Services (LCS)
Asset Upload”

Fill the details as shown below.
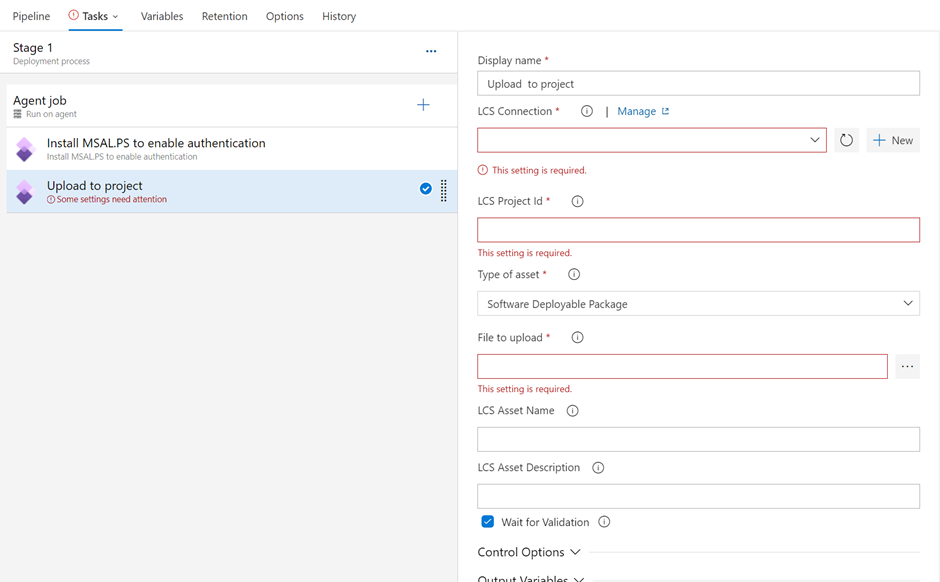
Click on +New on the LCS Connection
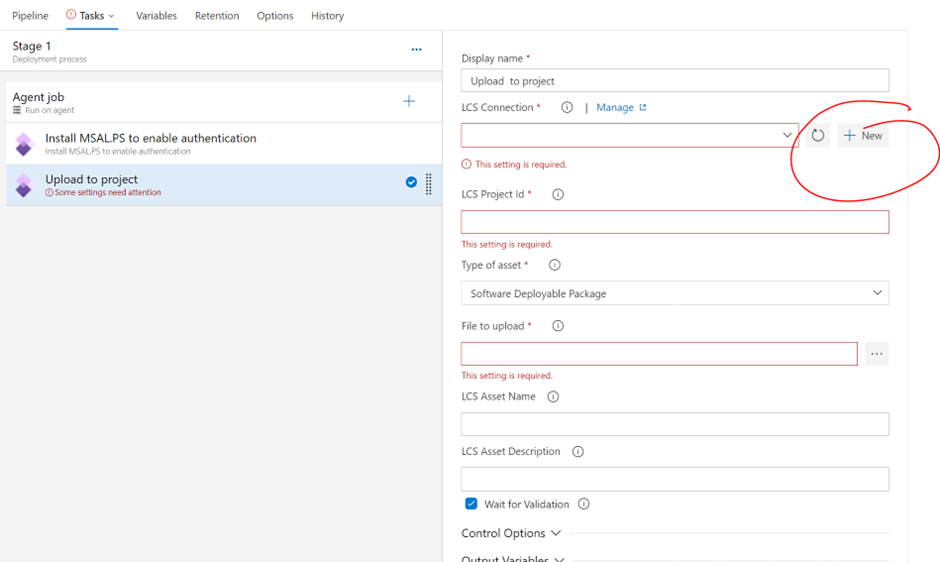
Fill the details for the LCS connection.

File to upload: Click on the three dots and select the
AXDeployableRuntime.
To automate the process and to select
the latest build generated by the pipeline use the _$(Build.BuildNumber).zip as shown in the
below command

$(System.DefaultWorkingDirectory)/_Build
Dev/Packages/AXDeployableRuntime_XXXXXXX_$(Build.BuildNumber).zip
LCS Asset Name: Dev
branch -$(Release.ReleaseName)
LCS Asset Descritpion:
Dev branch - $(Release.ReleaseName) - $(Build.BuildNumber)
Enter the name on the Reference name:
“OutputVariableName”

Stage 3: Select “Dynamics Lifecycle Services (LCS) Asset Deployment”

Fill the mandatory fields on the
stage 3:

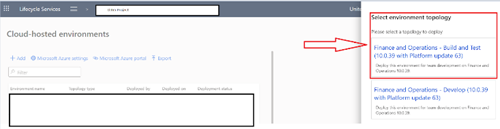
LCS Environment Id : Fill the details of the environment you plan
to deploy. The Environment Id details found in LCS.
LCS File Asset Id:
$(OutputVariableName.FileAssetId)


No comments:
Post a Comment